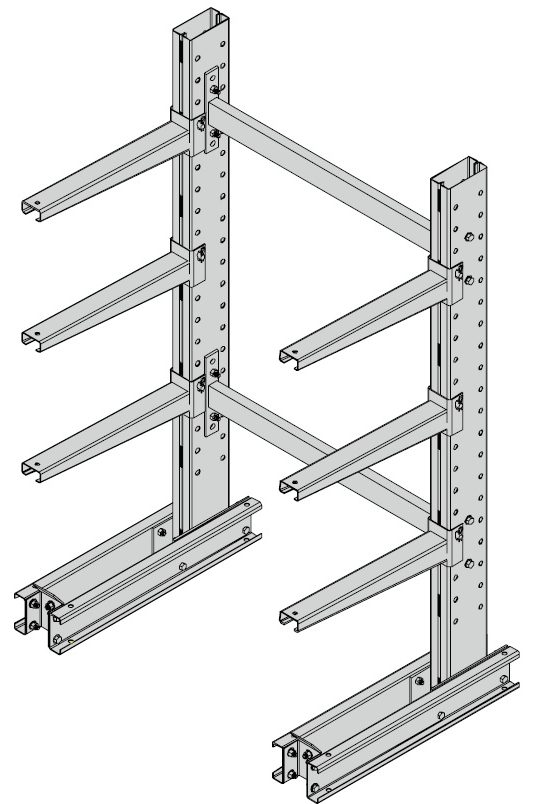
Instructions For Assembling MECO OMAHA SERIES 1000 MEDIUM DUTY Cantilever Rack
This cantilever rack system should be professionally installed by individuals familiar with this type of structure. Any modification to the rack during or after its assembly may affect the rack’s structural integrity.
General Assembly Procedure
- Snap a chalk line on the floor to show where the front of the rack will be.
- With the bolts finger tight assemble the first and second uprights to the bases and assemble the bracing in between uprights. Tighten all bolts in the first upright as described below making sure the upright is square with the base. Assemble the next upright finger tight and tighten the previous upright. Continue in this manner for each succeeding upright until the entire rack is assembled.
- If floor is not level, place shims under the base until upright is vertical.
- Tighten all bolts within a given connection to a snug-tight condition. Snug-tight is defined as the tightness that exists when the plies of the joint are in firm contact. This may be attained by a few impacts of an impact wrench or the full effort of a man using an ordinary spud wrench. Repeat this process for all connections in the rack.
- Bases must be anchored to the floor. A minimum of two 1/2″ x 4-1/4″ anchors per base one at each end are required.
Maintenance
- Inspect all bolted connections at least once each year and tighten any loose bolts using the procedure described above.
- Should any rack component become damaged by either misuse or accident, the component must be replaced immediately.
Usage
- Wherever possible, store the heaviest loads on the base or lowest level(s).
- All loads shall be positioned as close to the upright as possible and centered left/right across the rack.
- Do not slide loads onto or off of the rack.
- Do not drop loads onto the rack.
INSTRUCTIONS FOR ASSEMBLING MECO OMAHA SERIES 1000 MEDIUM DUTY CANTILEVER RACKS
* DO NOT SUBSTITUTE HARDWARE TIGHTEN FINGER TIGHT ONLY AT THIS STEP
- Attach one of the base channels to the upright. Attach upright to base with 1/2 x 11/4 bolts, hex nuts and lock washers. Bolts are required in all holes.
- Attach the base end to the front of the base channel using (2) 1/2 x 11/4 bolts, hex nuts, and (4) 1/2 flat washers. For double sided bases attach another base end to the opposite end of the base channel using (2) 1/2 x 11/4 bolts, hex nuts and (4) 1/2 flat washers.
- Attach the other base channel to the other side of the upright using 1/2 x 11/4 bolts, hex nuts and lock washers. Attach this base channel to the base end(s) using (2) 1/2 x 11/4 bolts, hex nuts and (4) 1/2 flat washers per base end.
- If base lips are supplied, they should be attached at this time using one 1/2 x 11/4 bolt and hex nut per base lip.
Attach horizontal braces to upright as shown in DIAGRAM C and DIAGRAM D using 1/2 x 41/2″ bolts. Finger tighten only at this time. 6′ – 10′ uprights require (2) horizontal braces. See DIAGRAM E. When attaching horizontal braces to 10′ uprights, use top and bottom sets of holes only. 12′ uprights require (3) horizontal braces.
After two uprights have been assembled, begin tightening hardware in the manner described in the “General Assembly Procedure” at the beginning of this booklet.
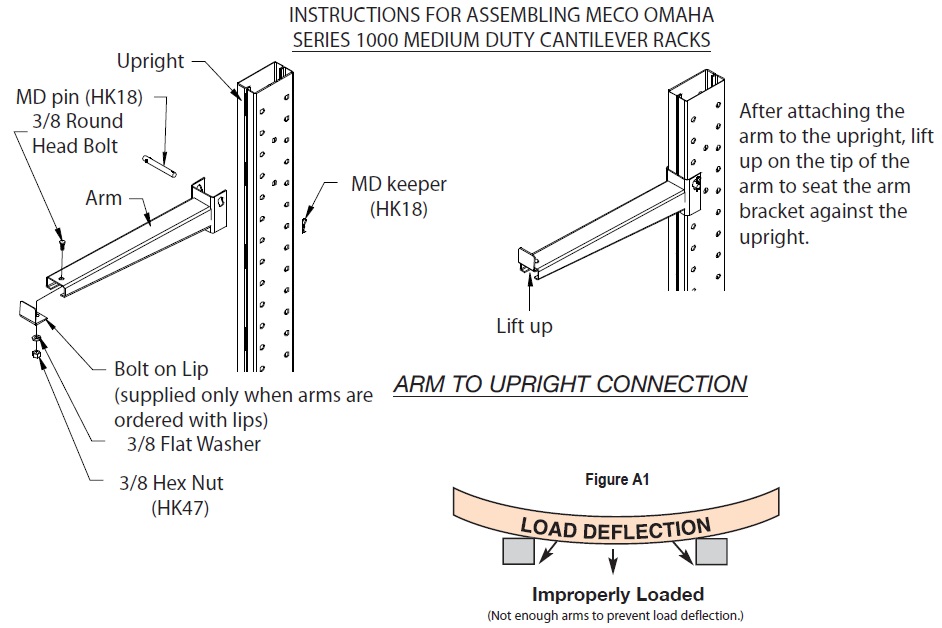
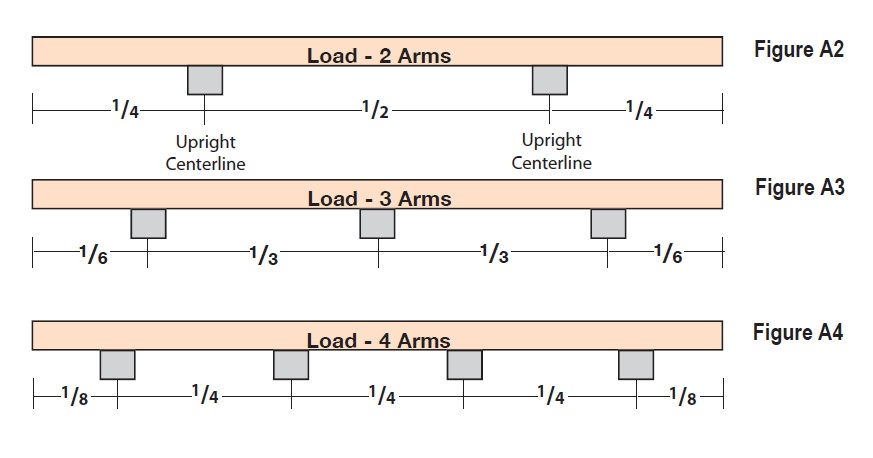
The load must be supported by enough arms to prevent load deflection. Deflection may cause damage to the load being stored as well as the arms (figure A1). To detect deflection, place the load over two wooden blocks (to represent cantilever arms) as shown in figure A2. If deflection is not present it is acceptable to use a two arm system as long as this does not create an overload condition. If the load shows deflection use three blocks as shown in figure A3 or four blocks as in figure A4. Important: The load should overhang the end arms by one-half the distance from upright centerline to upright centerline. Failure to observe this measure may cause an overload condition on the arms.


